
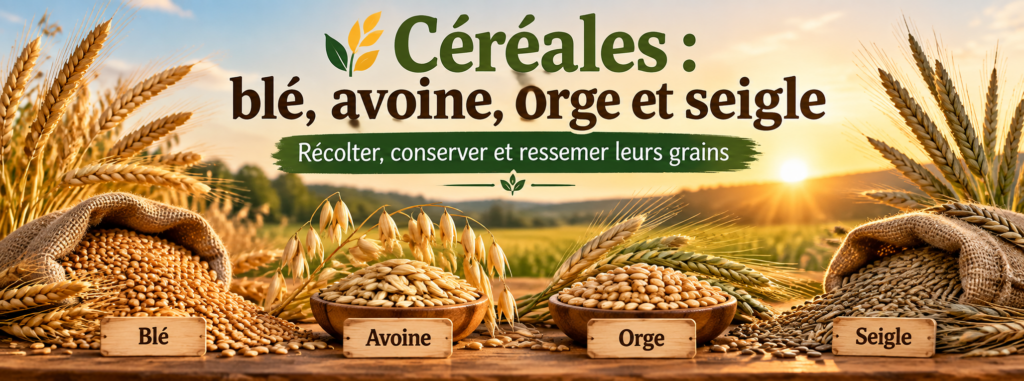
Harvest, store and resow their grains
Wheat, oats, barley and rye can be grown not only for food, but also to produce and preserve their own seeds.
Their cycle is generally more straightforward than that of biennial vegetables, but particular attention should be paid to:
- the maturity of the ears or panicles; ;
- pollination;
- drying;
- sorting;
- and grain storage.
The general cycle is:
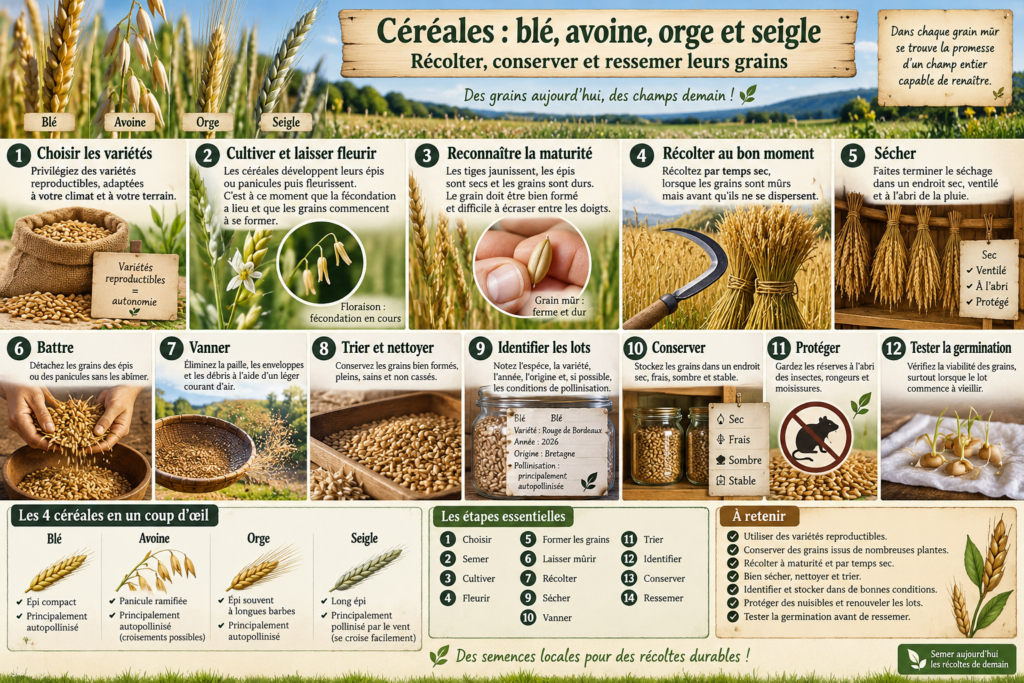
Choose → Sow → Grow → Flower → Form grains → Allow to ripen → Harvest → Dry → Thresh → Sort → Label → Store → Resow
🌱 Choose the right varieties
To produce grains intended for resowing, give preference to:
- some reproducible varieties or landrace populations;
- healthy, vigorous plants;
- well-formed ears;
- varieties adapted to your climate and growing conditions;
- a sufficient number of plants to maintain good diversity.
⚠️ Avoid hybrids for a renewable seed reserve
Some modern cereals may result from specific breeding or hybridisation.
When the aim is to preserve and resow your own grains year after year, give preference to varieties whose seeds remain stable and reproducible.
A good harvest does not necessarily guarantee true-to-type seed for the next generation.
🌾 Understanding the differences in pollination
Not all cereals behave in exactly the same way.
🌾 Wheat
Wheat is mainly self-pollinated.
Most flowers are fertilised by their own pollen, which naturally limits cross-pollination between varieties.
However, cross-pollination can still occur.
🌾 Barley
Barley is also largely self-pollinated.
The risk of cross-pollination between varieties is therefore relatively low, but not entirely absent.
🌾 Oats
Oats are mainly self-pollinated, but occasional cross-pollination can also occur.
🌾 Rye
Rye is very different.
It is mainly pollinated by the wind and readily cross-pollinates between plants and compatible varieties.
To preserve a rye variety as faithfully as possible, you therefore need to pay particular attention to the presence of other flowering rye nearby.
Wheat, barley and oats retain their identity more easily; rye depends more heavily on wind-borne pollen.
🌱 Preserve enough plants
To build a sustainable reserve, avoid producing an entire generation from only a few ears.
Preserve grains from grains from many healthy plants helps to:
- to preserve greater diversity;
- to maintain the vigour of the population;
- to limit excessive unintended selection;
- to gradually adapt the variety more effectively to your environment.
A cereal is not just a grain: an entire population carries the diversity that will allow future harvests to continue.
🌼 Flowering, grain formation and recognising maturity
After vegetative growth, cereals develop their ears or panicles, then begin flowering.
This is when fertilization takes place and the future seeds begin to form.
🌾 Wheat
Wheat produces a compact ear.
After flowering, the grains gradually develop inside the spikelets.
At first, they are:
- small;
- tender;
- rich in moisture.
Then they grow larger, harden and take on their final colour.
🌾 Barley
Barley also forms an ear, often easily recognised by its long awns, depending on the variety.
After fertilisation, the grains gradually fill the ear and then begin to dry.
🌾 Oats
Oats produce a branched panicle rather than a compact ear.
The grains hang from small branches.
They do not always all ripen at exactly the same time.
You therefore need to observe the entire panicle before deciding when to harvest.
🌾 Rye
Rye forms long ears.
Its flowering relies heavily on the wind to carry pollen between plants.
After fertilisation, the grains fill out and gradually harden.
🌱 The main stages of ripening
The formation of the grain generally goes through several stages:
Flowering → fertilisation → soft grain → filling → hardening → drying
As long as the grain is still very soft or easily crushed, it is not ready for long-term storage.
☀️ Recognising maturity
As maturity approaches:
- the stems begin to turn yellow;
- the ears or panicles become drier;
- the grains harden;
- their colour becomes more uniform;
- the plant’s moisture content decreases significantly.
When the grain is ripe, it should be firm, well formed and difficult to crush between your fingers.
⚠️ Do not harvest too early
Harvesting too early can result in grains that are:
- poorly filled;
- too moist;
- more susceptible to mould;
- less suitable for resowing.
Conversely, waiting too long can increase losses caused by:
- grain loss;
- birds;
- wind;
- adverse weather conditions.
The right time is when the grain has finished developing, but before the crop begins to disperse naturally.
✂️ Harvest the ears and panicles at the right time
Harvesting should be done when the grains are ripe, well formed and sufficiently dry, but before any of them begin to fall or are lost.
🌾 Wheat, barley and rye
Wait until:
- the stems have turned largely yellow;
- the ears are dry;
- the grains are hard;
- they resist pressure from a fingernail;
- the plant has lost much of its moisture.
You can then cut the ears with a portion of the stem.
Group them into small bundles or place them in a clean container.
A grain intended for resowing should be harvested at full maturity, not simply when it appears dry on the surface.
🌾 Oats
Oats require a little more attention because the grains on the same panicle can ripen at slightly different times.
Observe the entire panicle:
- most of the grains should be hard and well formed;
- the stems should begin to dry;
- the ripest grains should not yet be falling off in large numbers.
It may be useful to harvest in several passes if ripening is very uneven.
☀️ Choose dry weather
Harvest preferably:
- in dry weather;
- after the dew has dried;
- when the plants are not wet from rain.
This reduces the risk of mold during drying.
💨 Finish drying after harvest
Even when the cereal appears dry in the field, let the ears or panicles finish drying in a place that is:
dry → well-ventilated → sheltered from rain → protected from rodents and birds
Avoid placing them immediately in a plastic bag or airtight container.
🧺 Prepare for threshing
When the ears and grains are completely dry, they can be threshed to separate the grains from the straw and husks.
Harvesting at the right time preserves the grain; completing the drying process prepares it for storage.
🤲 Thresh, winnow, sort and clean the grains
Once the ears or panicles are completely dry, the grains must be separated from the plant material.
Once the ears or panicles are completely dry, the grains must be separated from the plant material.
🌾 Threshing cereals
Threshing consists of separating the grains from the ears or panicles.
For small quantities, you can:
- rub the ears between your hands;
- gently crush them in a sturdy bag;
- or gently beat them against a clean surface.
The aim is to release the grains without breaking or crushing them..
Effective threshing separates the grain from the ear while keeping seeds intended for replanting intact.
🌬️ Winnow
🤲 Thresh, winnow, sort and clean the grains
Once the ears or panicles are completely dry, the grains must be separated from the plant material.
Once the ears or panicles are completely dry, the grains must be separated from the plant material.
🌾 Threshing cereals
Threshing consists of separating the grains from the ears or panicles.
For small quantities, you can:
- rub the ears between your hands;
- gently crush them in a sturdy bag;
- or gently beat them against a clean surface.
The aim is to release the grains without breaking or crushing them..
Effective threshing separates the grain from the ear while keeping seeds intended for replanting intact.
🌬️ Winnow
After threshing, you will usually have a mixture of:
grains → pieces of straw → husks → dust → plant debris
Winnowing helps remove some of the lighter material.
You can gently pour the mixture from one container to another using a very light airflow.
The lighter debris is carried away, while the heavier grains fall back into the container.
⚠️ Proceed gradually
An airflow that is too strong can also carry away some of the grains.
An airflow that is too strong can also carry away some of the grains.
🧺 Sort the grains
After winnowing, carry out a final sorting.
Preferably, save the seeds:
- fully developed;
- hard;
- of normal size for the variety;
- free from mold;
- free from significant signs of disease;
- not broken or severely damaged.
Discard seeds that are very small, hollow, or visibly damaged.
🌾 Important considerations depending on the cereal crop
Some varieties retain more of their husks around the grain after threshing.
It is not always necessary to remove all these husks when the grain is intended for resowing, as long as the seed is clean, dry, and healthy.
💨 Check the drying one last time
After cleaning, leave the grains to dry for a few more days if you have any doubts about their moisture content.
They must be completely dry before storage.
Temporarily store them in a place that is:
dry → cool → well-ventilated → protected from moisture and pests
A clean grain is ready to be labeled; a completely dry grain is ready to be stored.
🏷️ Label the batches
Once the grains are completely dry and cleaned, clearly label each batch.
Note at least:
- 🌾 The species and variety ;
- 📅 the year of harvest ;
- 📍 the origin or growing location ;
- 🌬️ Pollination conditions, if known;
- 📝 any useful observations about the cultivation or harvest.
Example:
Wheat — Open-pollinated variety
Harvest: 2026
Origin: Brittany
Pollination: Primarily self-pollinated
🫙 Where should they be stored?
Place the grains in a clean, completely dry container.
You can use:
- Clearly labeled envelopes or bags;
- Jars;
- or airtight containers. only when the grains are completely dry.
Then store the batches in a place that is:
dry → cool → dark → with a stable temperature
Avoid in particular:
- moisture;
- extreme heat;
- direct sunlight;
- significant temperature fluctuations.
🐭 Protect against pests
Cereal grains can easily attract certain insects and rodents.
Therefore, inspect your seed stores regularly.
To minimize losses:
- Store only clean, healthy grains;
- Use properly sealed containers once the grains are completely dry;
- Keep your seed storage area clean;
- Check for signs of holes, unusual dust, insects, or mold;
- Immediately isolate any suspicious batch.
Stored grains must be protected from both moisture and animals that might see them as their own personal pantry.
⏳ How long?
When properly dried and stored, cereal grains can remain viable and capable of germinating for several years.
However, their viability gradually decreases over time.
For a seed reserve intended for future sowing, it is preferable to renew the batches regularly rather than waiting until they become too old.
🌱 Test before resowing
When a batch of seeds starts to age, carry out a simple germination test.
Place a known number of seeds on a moist surface, keep them under suitable conditions, and then count how many actually germinate.
This helps determine whether the seed batch is still sufficiently viable before sowing an entire plot.
A bag full of grains is only a true seed reserve if those grains are still capable of growing into new plants.
Wheat, Oats, Barley and Rye — Key Takeaways
- 🌱 Choose open-pollinated, stable varieties that are well adapted to local growing conditions.
- 🌾 Save seeds from many different plants to preserve greater genetic diversity.
- 🌬️ Remember that wheat, barley, and oats are predominantly self-pollinating., whereas the rye relies more heavily on wind pollination and cross-pollinates more easily.
- 🌼 Allow the grains to reach full maturity before harvesting.
- ✂️ Harvest in dry weather when the stalks turn yellow and the grains are hard.
- 💨 Complete the drying process in a dry, well-ventilated, and sheltered place.
- 🤲 Thresh gently to release the grains without damaging them.
- 🌬️ Winnow gradually to remove straw, husks, and debris.
- 🧺 Sort and keep well-formed, plump, healthy, and unbroken grains.
- 🏷️ Label the species, variety, year, origin, and, if possible, pollination conditions.
- 🫙 Store in a dry, cool, dark place with a stable temperature.
- 🐭 Protect stored seeds from insects, rodents, and mold.
- 🔄 Regularly renew seed batches to maintain good seed viability.
- 🌱 Test germination when the grains begin to age.
Select → Sow → Grow → Flower → Form Grains → Allow to Ripen → Harvest → Dry → Thresh → Winnow → Sort → Label → Store → Resow
Within every ripe grain lies far more than a harvest: it holds the promise of an entire field waiting to be reborn.
🇫🇷 Version française
🇬🇧 English version
To understand the full approach, visit the Seed Harvesting Project and discover the other practical guides dedicated to seed preservation and the passing on of knowledge.
Also discover the work of FAO on the conservation of plant genetic resources for food and agriculture.